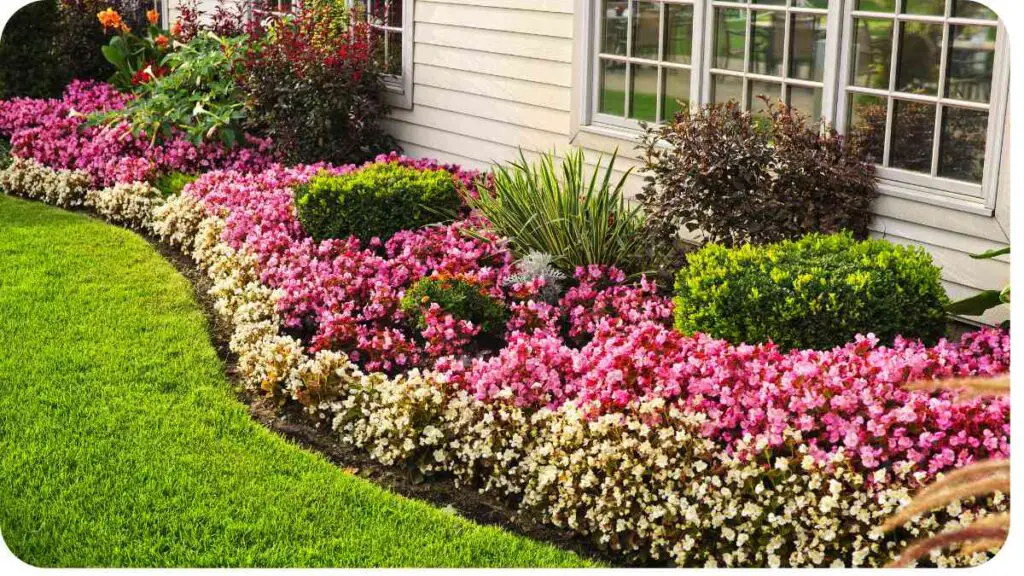
Garden edging serves both functional and aesthetic purposes in landscaping. It defines borders, keeps soil and mulch in place, and adds visual appeal to outdoor spaces. However, over time, garden edging can suffer wear and tear from various factors, leading to damage that detracts from its functionality and beauty.
In this comprehensive guide, we’ll explore how to address damaged garden edging, from DIY repairs to professional solutions and even replacement options. Whether you’re a seasoned gardener or just starting out, understanding how to fix damaged garden edging can help you maintain a polished and well-maintained landscape.
| Key Takeaways |
|---|
| Regular inspections help catch damage early. |
| DIY repairs are feasible for minor damage. |
| Professional assistance may be needed for extensive damage. |
| Choose durable materials for long-lasting edging. |
| Prevent future damage with proper maintenance. |
Understanding Garden Edging Damage

Garden edging can sustain damage from a variety of sources, ranging from natural wear and tear to accidental impacts. Understanding the types of damage that can occur is essential for effective repair and maintenance. Here are some common forms of garden edging damage:
Revitalize your outdoor space with our DIY guide on repairing torn outdoor furniture fabric. Learn how to mend tears and preserve fabric integrity for long-lasting enjoyment of your outdoor furniture.
Types of Damage:
- Cracks: Cracking is a prevalent issue, particularly with materials like concrete or plastic. Cracks can occur due to freezing and thawing cycles, heavy foot traffic, or the settling of the ground beneath the edging.
- Bending or Warping: Edging materials such as metal or plastic may bend or warp over time, especially if they are not properly anchored into the ground. This can result in uneven edges and detract from the overall appearance of the landscape.
- Loosening: Edging that is not securely anchored may become loose over time, especially in areas with frequent ground movement or erosion. Loose edging can shift out of place, creating gaps or uneven edges along garden borders.
- Corrosion or Rust: Metal garden edging, such as steel or iron, is susceptible to corrosion and rust, especially in humid or wet environments. This can weaken the edging and compromise its structural integrity.
Severity Levels:
The severity of garden edging damage can vary from minor cosmetic issues to significant structural problems. Understanding the severity of the damage is crucial for determining the appropriate repair or replacement strategy. Here are some common severity levels:
- Minor Damage: Minor damage may include small cracks, minor bending, or loosening of edging sections. While these issues may not affect the functionality of the edging, they can detract from its appearance.
- Moderate Damage: Moderate damage may involve larger cracks, significant bending or warping, or partial detachment of edging sections. Moderate damage can impact both the functionality and aesthetics of the edging.
- Severe Damage: Severe damage includes extensive cracking, complete bending or warping, or total detachment of edging sections. Severe damage significantly impairs the functionality and appearance of the edging and may require complete replacement.
Understanding the specific type and severity of garden edging damage is essential for determining the most appropriate course of action for repair or replacement. In the following sections, we’ll explore DIY repair techniques, professional repair options, and replacement strategies to help you restore and maintain your garden edging effectively.
Is your garden edging showing signs of separation? Discover effective solutions to this common issue in our comprehensive guide to solving garden edging separation problems, ensuring your landscape stays neat and well-defined.
Common Causes of Garden Edging Damage

Understanding the factors that contribute to garden edging damage is key to preventing future issues and implementing effective repair strategies. While some causes of damage are inevitable due to natural wear and tear, others can be mitigated with proper maintenance and care. Here are some common reasons why garden edging may become damaged:
- Weather Exposure: Exposure to harsh weather conditions such as extreme heat, freezing temperatures, heavy rain, and strong winds can take a toll on garden edging materials. Over time, repeated exposure to these elements can cause cracking, warping, and corrosion.
- Ground Movement: Shifting soil, ground settling, and erosion can all contribute to garden edging damage. As the ground moves, edging materials may become dislodged, crack, or bend out of shape.
- Foot Traffic: Areas near garden beds or pathways are often subject to foot traffic, which can cause wear and tear on garden edging. Constant pressure from walking or standing on edging materials can lead to cracks, bending, or loosening over time.
- Vegetation Growth: The growth of roots and plants near garden edging can exert pressure on the edging materials, causing them to crack or become displaced. Additionally, aggressive plants or weeds may push against edging, leading to damage.
- Poor Installation: Improper installation of garden edging can contribute to premature damage and failure. Edging that is not securely anchored into the ground or properly aligned may be more susceptible to shifting, cracking, or bending.
- Corrosion: Metal garden edging, such as steel or iron, is vulnerable to corrosion, especially in areas with high moisture levels or salt exposure. Corrosion can weaken the structural integrity of the edging and lead to rust-related damage.
- Impact Damage: Accidental impacts from lawnmowers, trimmers, or garden tools can cause immediate damage to garden edging. These impacts can result in cracks, dents, or bends, depending on the force of the collision.
By understanding the common causes of garden edging damage, gardeners can take proactive measures to mitigate risks and prolong the lifespan of their edging materials. In the following sections, we’ll explore how to assess the damage to determine the best course of action for repair or replacement.
Assessing the Damage
Before proceeding with repairs or replacements, it’s essential to thoroughly assess the extent of the damage to your garden edging. Proper assessment will help you determine the most effective course of action and ensure that repairs are carried out efficiently. Here’s how to assess the damage to your garden edging:
Types of Damage:
1. Cracks:
- Description: Inspect the edging for any visible cracks or fissures.
- Location: Note the location and extent of cracks, as well as any patterns or areas of concentration.
- Severity: Determine whether the cracks are superficial or deep, and assess their impact on the structural integrity of the edging.
2. Bending or Warping:
- Observation: Look for signs of bending, warping, or distortion in the edging material.
- Extent: Measure the degree of bending or warping and assess its impact on the edging’s functionality and appearance.
- Cause: Identify any underlying factors contributing to the bending or warping, such as ground movement or improper installation.
3. Loosening:
- Movement: Check for any sections of edging that are loose or shifting out of place.
- Anchoring: Assess the anchoring mechanisms to determine whether they are securely holding the edging in place.
- Stability: Test the stability of the edging by applying gentle pressure to see if it moves or shifts easily.
Restore the beauty of your weathered wooden outdoor furniture with our expert tips. Follow our guide to restoring weathered wooden outdoor furniture to bring back its original charm and extend its lifespan.
4. Corrosion or Rust:
- Visual Inspection: Examine metal edging for signs of corrosion, rust, or deterioration.
- Severity: Determine the extent of corrosion and assess whether it compromises the structural integrity of the edging.
- Preventive Measures: Identify potential causes of corrosion, such as exposure to moisture or chemicals, and take steps to prevent further damage.
Severity Levels:
Minor Damage:
- Cosmetic Issues: Minor cracks or bending that do not significantly affect the functionality of the edging.
- Repairability: Minor damage may be easily addressed with simple repairs or maintenance techniques.
Moderate Damage:
- Functional Impairment: Significant cracks, bending, or loosening that impact the effectiveness of the edging.
- Repair Considerations: Moderate damage may require more extensive repairs or professional intervention to restore functionality.
Severe Damage:
- Structural Compromise: Extensive cracks, severe bending or warping, or complete detachment of edging sections.
- Replacement: Severe damage may necessitate the complete replacement of the edging to ensure proper functionality and aesthetics.
By thoroughly assessing the damage to your garden edging, you can make informed decisions about the most appropriate repair or replacement options. In the following sections, we’ll explore DIY repair techniques, professional repair options, and replacement strategies to help you address damaged garden edging effectively.
DIY Repair Techniques
Repairing damaged garden edging can often be accomplished through simple do-it-yourself techniques, especially for minor to moderate damage. With the right tools and materials, you can restore the functionality and appearance of your edging without the need for professional assistance. Here’s a step-by-step guide to common DIY repair techniques for garden edging:
Tools and Materials Needed:
Before starting any repairs, gather the following tools and materials:
- Safety Gear: Gloves, safety goggles
- Repair Materials: Depending on the type of damage, you may need:
- Concrete patching compound
- Epoxy resin or adhesive
- Landscape adhesive
- Replacement stakes or anchors
- Repair Tools:
- Trowel
- Putty knife
- Hammer
- Screwdriver or drill
- Clamps or weights (for straightening bent edging)
Step-by-Step Guide for Common Repairs:
1. Filling Cracks:
- Clean the area around the crack to remove dirt, debris, and loose material.
- Apply a concrete patching compound or epoxy resin to fill the crack, following the manufacturer’s instructions.
- Smooth the patching compound or resin with a putty knife and allow it to cure completely.
2. Straightening Bent Edging:
- Identify the bent or warped sections of edging.
- Using clamps or weights, gently straighten the edging by applying pressure in the opposite direction of the bend.
- If necessary, secure the edging in place with landscape adhesive or replacement stakes.
3. Reattaching Loose Edging:
- Dig out the area around the loose section of edging to expose the anchoring mechanism.
- Clean the anchoring mechanism and the underside of the edging to ensure proper adhesion.
- Apply landscape adhesive to the anchoring mechanism and press the edging firmly into place.
- If needed, use replacement stakes or anchors to secure the edging in place while the adhesive dries.
By following these DIY repair techniques, you can address common issues such as cracks, bending, and loosening in your garden edging. However, for more extensive damage or if you’re unsure about tackling repairs yourself, it may be advisable to seek professional assistance. In the next section, we’ll explore professional repair options for garden edging.
Don’t let worn-out garden hose reels disrupt your outdoor tasks. Explore our DIY solutions for repairing worn-out garden hose reels to ensure efficient and hassle-free watering in your garden or yard.
Professional Repair Options
While many garden edging repairs can be tackled as DIY projects, some situations may require the expertise of a professional landscaper or contractor. Professional repair options offer specialized knowledge, skills, and equipment to address complex or extensive damage effectively. Here are some professional repair options for garden edging:
Hiring a Landscaper:
- Expertise: Landscapers have extensive experience in repairing and maintaining garden edging.
- Assessment: A professional landscaper can accurately assess the extent of the damage and recommend the most appropriate repair solutions.
- Quality Workmanship: Landscapers have access to specialized tools and materials, ensuring high-quality repairs that withstand the test of time.
- Efficiency: Professional landscapers can complete repairs efficiently, minimizing disruption to your outdoor space.
- Warranty: Many landscaping companies offer warranties or guarantees on their work, providing peace of mind for homeowners.
Cost Considerations:
- Labor Costs: The cost of hiring a landscaper will depend on factors such as the extent of the damage, the complexity of the repairs, and local labor rates.
- Materials: In addition to labor costs, you’ll need to budget for any materials or supplies required for the repairs.
- Comparative Quotes: It’s a good idea to obtain quotes from multiple landscapers to compare prices and services before making a decision.
- Long-Term Value: While professional repairs may have a higher upfront cost, they can offer long-term value by ensuring durable, high-quality results.
When considering professional repair options for your garden edging, be sure to research local landscapers or contractors with experience in edging repair and maintenance. Ask for references, check online reviews, and inquire about warranties or guarantees to ensure you’re choosing a reputable and reliable service provider.
Address lawn thatch buildup effectively with our guide to its causes and solutions. Learn how to tackle this issue and maintain a healthy lawn by managing lawn thatch buildup with our expert advice.
Replacing Damaged Garden Edging

In some cases, repairing damaged garden edging may not be feasible, especially if the damage is severe or extensive. In such situations, replacing the damaged edging may be the best course of action to restore the functionality and aesthetics of your landscape. Here’s a step-by-step guide to replacing damaged garden edging:
Choosing Replacement Materials:
- Consider Durability: Select materials that are durable and weather-resistant to ensure longevity.
- Match Existing Style: Choose replacement materials that complement the style and design of your existing landscape.
- Options: Common replacement materials include:
- Metal edging (steel, aluminum)
- Plastic or vinyl edging
- Wood edging (pressure-treated, cedar)
- Composite materials
Installation Process:
1. Digging Out the Old Edging:
- Use a shovel or garden spade to carefully dig out the old edging, starting at one end and working your way along the length of the border.
- Remove any debris or remnants of the old edging to create a clean and level surface for installation.
2. Preparing the Area:
- Measure and mark the desired placement of the new edging using stakes or string.
- Prepare the ground by digging a trench along the marked line, ensuring it is wide and deep enough to accommodate the new edging material.
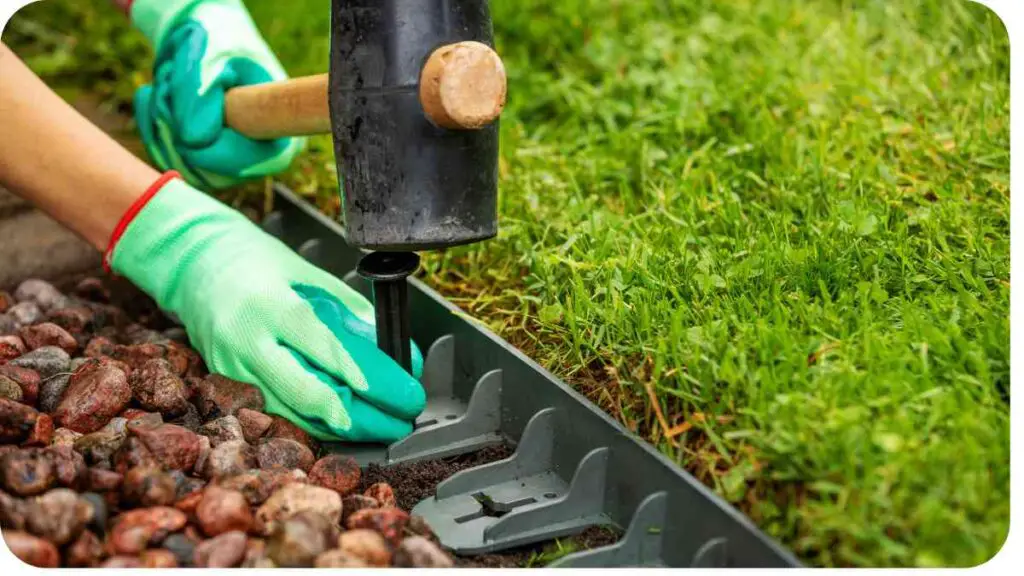
3. Installing New Edging:
- Place the new edging material into the trench, ensuring it is level and securely positioned.
- Use landscape stakes or anchors to secure the edging in place, following the manufacturer’s instructions.
- Backfill the trench with soil and compact it firmly around the edging to provide stability and support.
- If necessary, use a rubber mallet or hammer to gently tap the edging into place and ensure a snug fit.
Finishing Touches:
- Once the new edging is installed, inspect it carefully to ensure it is properly aligned and securely anchored.
- Add any additional landscaping elements, such as mulch or decorative stones, to complete the border and enhance the overall appearance of your garden.
By following these steps, you can replace damaged garden edging with new materials that restore the beauty and functionality of your landscape. However, if you’re unsure about tackling the replacement process yourself, consider hiring a professional landscaper to ensure the job is done correctly and efficiently.
Preventative Measures
Prevention is key to maintaining the integrity and longevity of garden edging. By implementing proactive measures and regular maintenance routines, you can minimize the risk of damage and preserve the beauty of your landscape. Here are some preventative measures to consider:
Maintenance Tips:
- Regular Inspections: Conduct routine inspections of your garden edging to identify any signs of damage or wear.
- Prompt Repairs: Address minor issues promptly before they escalate into more significant problems.
- Cleaning: Keep edging clean by removing dirt, debris, and vegetation buildup regularly.
- Weed Control: Control weeds and vegetation near garden edging to prevent them from pushing against or damaging the edging materials.
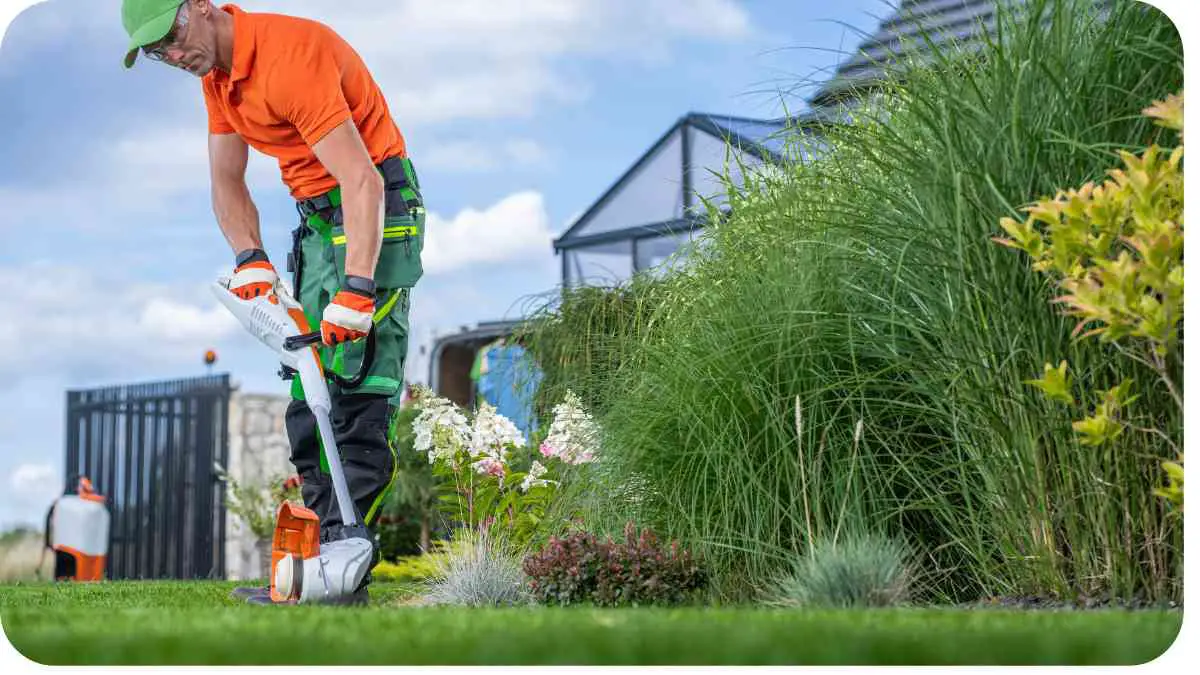
- Trimming: Trim grass, plants, and shrubs along the edging to maintain a neat and tidy appearance and prevent overgrowth.
Choosing Durable Materials:
- Research Options: Invest in high-quality edging materials that are durable, weather-resistant, and suited to your specific landscaping needs.
- Consider Climate: Select materials that can withstand the climatic conditions of your region, such as extreme heat, cold, or moisture.
- Longevity: Choose materials with a proven track record of longevity and performance to ensure your investment lasts for years to come.
Protective Measures:
- Edging Reinforcement: Install additional reinforcements, such as bender board or metal stakes, to provide extra support and stability for garden edging.
- Barrier Installation: Create a barrier between the edging and surrounding vegetation by installing a shallow trench or barrier fabric to prevent roots from infiltrating and causing damage.
- Sealing: Apply a sealant or protective coating to metal edging to help prevent corrosion and rust.
Seasonal Care:
- Winter Preparation: Prepare garden edging for winter by clearing debris, applying protective coatings, and ensuring proper drainage to prevent damage from freezing and thawing cycles.
- Summer Maintenance: During the summer months, monitor edging for signs of heat-related damage and provide adequate hydration to plants to prevent root intrusion.
Conclusion,
Maintaining garden edging is essential for preserving the beauty and functionality of your outdoor space. By understanding the common causes of damage, assessing the severity of issues, and implementing preventative measures, you can keep your garden edging looking its best for years to come.
Whether you choose to tackle repairs yourself or enlist the help of professionals, investing time and effort into maintaining your garden edging will pay off in the long run, enhancing the overall aesthetic appeal and value of your landscape.
Further Reading
- 4 Things to Repair or Refresh Every 5 Years: This article provides valuable insights into the essential maintenance tasks that should be performed every five years to keep your garden in top condition.
- Repairing Damaged Edges: Learn effective techniques for repairing damaged garden edges and restoring the integrity of your landscaping with expert tips from this comprehensive guide.
- Common Pitfalls and How to Sidestep Them: Discover common mistakes to avoid when installing and maintaining lawn edging, along with practical advice on how to navigate potential pitfalls for a flawless landscape.
FAQs
How often should I inspect my garden edging for damage?
Regular inspections are recommended, ideally every few months, to catch any issues early and prevent further damage.
What are some signs of damage to look out for?
Common signs of damage include cracks, bending or warping, loosening, and corrosion (for metal edging).
Can I repair garden edging myself?
Yes, many minor repairs can be done as DIY projects. However, for more extensive damage or if you’re unsure, it’s advisable to seek professional assistance.
What materials are best for durable garden edging?
Materials such as steel, aluminum, or composite materials are known for their durability and longevity in garden edging applications.
How can I prevent future damage to my garden edging?
Regular maintenance, proper installation, and choosing high-quality materials are key factors in preventing future damage to garden edging.

Hi! My name is Hellen James, and I’m here to help you with your home-maintenance needs. Whether it’s building a better yard or just trying to fix a garden—I can show you how.


